I couldn't find a dining table I liked. Scratch that, I couldn't find a dining table I liked
that was cheap or free. We have a large kitchen and dining area to fill (comes with the large house), and I wanted a big gathering place-type table to fill it. I'm trying to see how far I can go furnishing it with free, reclaimed, salvaged, second-hand, etc pieces. I believe we can do it, and I believe we can make a lovely home in this manner, indeed :)
Craigslist was unfruitful. People either wanted too much for things I wasn't willing to settle for, or they lived too far away, or I couldn't fit their "beautiful antique piece that just has to be out today" into the back of my hatchback. I took all of this as a sign pointing me in a different direction. How do I get all of the pieces of a large dining table into our place, on my own, on the cheap? Build it myself!!
Enter the GREAT idea found here:
http://www.designsponge.com/2008/01/diy-project-dining-table.html . This sounded super fun and easy so..hell yes!
There are ways to make this project completely free. Scavenging a door, not treating it with anything, makeshift legs. I wasn't privy to any of these options at the moment, and hell, I wanted to see if I could build something beautiful from otherwise cheap or throw-away materials..so I may have splurged a little on the finishing details. The final product will still come in at hundreds of dollars less that an equivalent size table at retail, guaranteed. AND, this one will be personalized and one of a kind :)
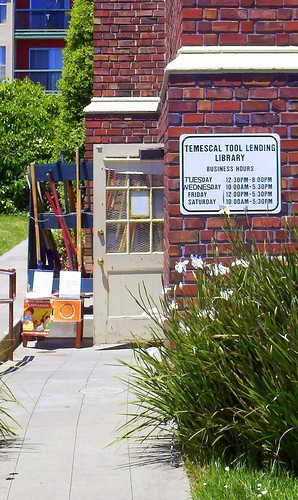
Step 1: Find a door
Accomplished this at our amazing
Urban Ore , the best salvage/recycling/treasure hunting warehouse I've found in the Bay Area. From the literally 100's of doors I whittled my choice down to a hollow core door (price - much cheaper), with no drilled though handle hole, and unpainted for easier staining. Cost: $25
Step 2: Find legs
The DIY recipe calls for a set of 4 Ikea Fintorp table legs, which as far as I can tell have since been discontinued. After much searching of flea markets, salvage yards, and craigslist, I couldn't find anything that floated my boat as a fancy replacement. My ideal vision was a set of 4 beautifully lathed banister type spindled legs...alas, nothing, so need overrode dream vision. I need a dining room table. Plan B mode set in and I checked my pride and walked in to Ikea. (Disclaimer: As much as I loathe the big box, assembly line, rat in a maze feeling of Ikea, {and the fact that buying their particle board shit makes me lose sleep} I do like walking through once in a while to brain-catalog design ideas. I can't lie, their designers are good, considering the materials they have to work with.) After 3 days of recon..no lie.. I settled on 2 of the
Vika Fagerlid legs in birch veneer (which apparently is also discontinued). This choice came from a couple of other necessities. The fact That I chose a hollow core door hit me during my leg contemplations: How am I going to sturdily attach legs to this thing?? Oops... Well, the Fagerlids have large wide flat tops that I can easily screw in to the corner joints of the door, and will support a larger piece of the door. They were also half price due to the whole dc'd thing. Score! Bonus that they have neato storage shelves on the sides for pretty vases, bowls, etc. Might attatch thin safety rails across the shelves so wayward feet can't smash. We tend to have our share of wayward feet wandering through our place.. Cost: $40 (marked down from $80)
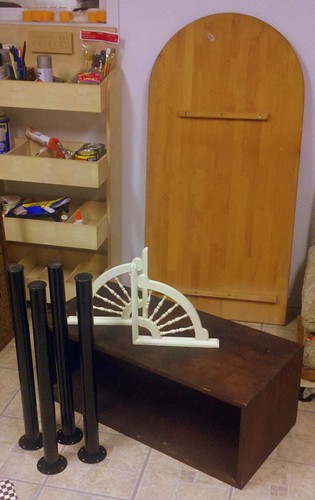
Step 3: Sand and Stain!!
The hands on part..my favorite. With my Aretha Frankiln Pandora station on I set to the job at hand. The door itself was lightly varnished so I only took a light sanding to it to rough it up for staining. It took the stain well.

The legs came in 6 piece segments that Sonny advised me (smartly) to stain before assembly. I was wary of staining Ikea pieces due to the fact that they were already "finished". I read through a few ppl's horror stories of trying to refinish Ikea pieces before totally losing interest and wanting to try it myself. My pieces are birch veneer and all these people were bitching about melamine and foils and laminate and whatever...I decided to try it anyway. I thought sanding to rough up light varnish would be better, but for some reason I went ahead and tried just a straight stain out on one of the smaller pieces on top of the finish. Call it laziness. It worked better that I could have thought. The stain penetrated and took on the gloss of the finish. Magic??

So, this is the stage I'm at. It's going to take overnight for the stains to set, then it's time for second coats, second opinions, second chances, etc..
Updates to come as the project is completed!